Getting to Work
Now it's time to start doing some real work with GDS. There are a couple of ways to approach it, depending on what your priorities are. Likely you'll be looking at one of several options:
- your first priority is getting runs and site tours working; or
- your first priority is getting job dispatch and welfare up and running; or
- your first priority is officer tracking and welfare
If your priority is site tours, you'll want to set up your callsigns and set up barcodes or NFC tags at your sites. As soon as that's done, you can start having the guards scanning on their patrols, then carry on with setting up the runs in GDS. Note that you can get useful results even before the runs are loaded. As long as you have the callsigns and the sites and site locations loaded you have enough to record site visits.
If your priority is jobs and job dispatch, set up your callsigns, then focus on your areas and job statuses (check the Basic Customisation chapter). Set up the areas and put the sites into the correct areas so that GDS knows which guards attend to which areas.
If you're interested in welfare, set up the callsigns and you're good to go. Welfare is automatic, but there are more advanced things you can do.
Setting Up Callsigns
Callsigns represent people who are doing work for us. Whenever a guard signs in on the PDA app they will be assigned a callsign.
Callsign Maintenance can be found by clicking Maintenance->Attending->Callsign Details, or by clicking the guard icon in the toolbar.
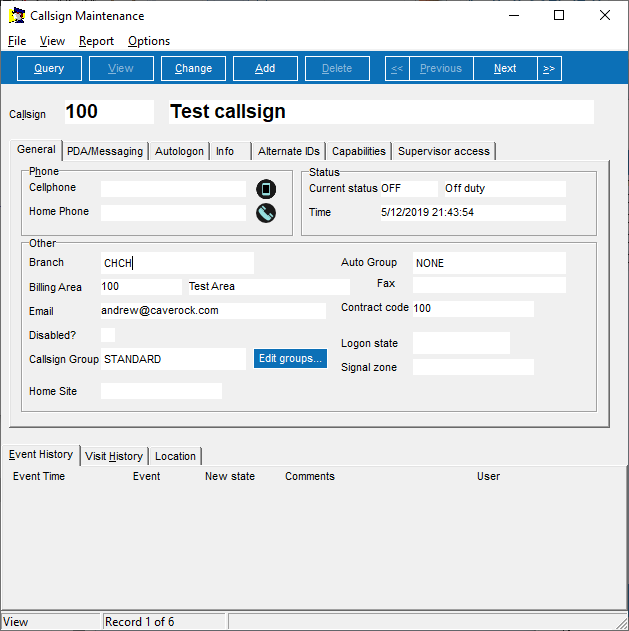
Just like most other maintenance windows within GDS, you can use the standard search toolbar at the top of the window to find, add and update callsigns.
To add a new callsign, you'll need to assign a callsign code and fill in the name at the top. GDS also insists that a branch be assigned, and that a billing area is set. When you're starting out, feel free to just use the defaults of CHCH and 100. Later on, you can set these up properly in Maintenance->Attending->Branch and Maintenance->Attending->Area details.
To allow a callsign to sign into the PDA app, we need to set up the login details for it. Switch to the PDA/Messaging tab:
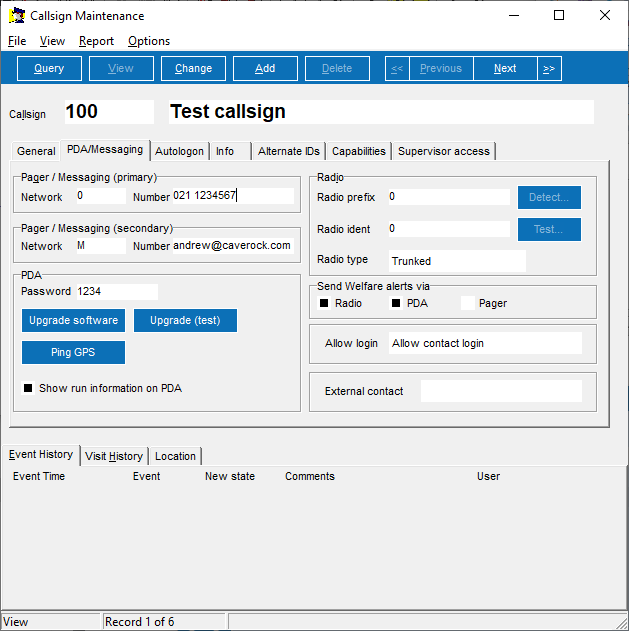
To allow PDA login, set the PDA password, and change the 'Allow login' setting to 'allow contact login'. By default, GDS encourages us to use Contact logins, which allows us to tie real people to callsigns. This allows us to give each of the staff members their own personal login and password, and allows us to see which person is assigned to each callsign. To find out more about that, read the Contact Logins section. For the moment though we'll just login as callsigns directly.
The Pager/Messaging fields are optional. Jobs and messages automatically go to guards signed into the PDA app. In addition, GDS can send to SMS/pager networks (network 0), and to email addresses (network M).
Barcode and tag locations
GDS supports both the use of printed barcodes and NFC tags. You can use either, or a combination of both, even on the same site. The two technologies have different advantages. You can read about this in the
NFC vs Barcode appendix.Each tag or barcode is identified by a unique number, which we store on NFC tags or print on barcodes. We call it the barcode ID, even if NFC tags are in use. The barcode ID is coded with a number and an identifier that ties it to your copy of GDS. By coding just these things, if a member of the public should scan any of the tags or barcodes all they get is the barcode ID, which has no sensitive information in it. The identifier, which GDS handles for you, ensures that if two different companies running GDS work at a single site then you won't accidentally scan the other GDS's tag, as the PDA app will ignore these.
You are responsible for selecting which barcode IDs you wish to use. We recommend that you start from barcode 1000 and go from there: 1000, 1001, 1002 and so on. Shorter numbers scan more quickly, especially on barcodes (there's little difference for NFC tags). The only rule is that each barcode ID must be used only once throughout the system.
If you need to find a free block of barcode IDs, go into Reports->Make Barcodes. GDS will auto-select a first barcode ID such that the number it selects and the next 999 numbers are guaranteed to be unused. This also happens to be the best place to generate printed barcodes. You can print these out to sticker-backed paper, or you can send them to a professional printing company to be made into stickers.
To set up barcode or tag locations, go into the Locations tab in Client Maintenance:
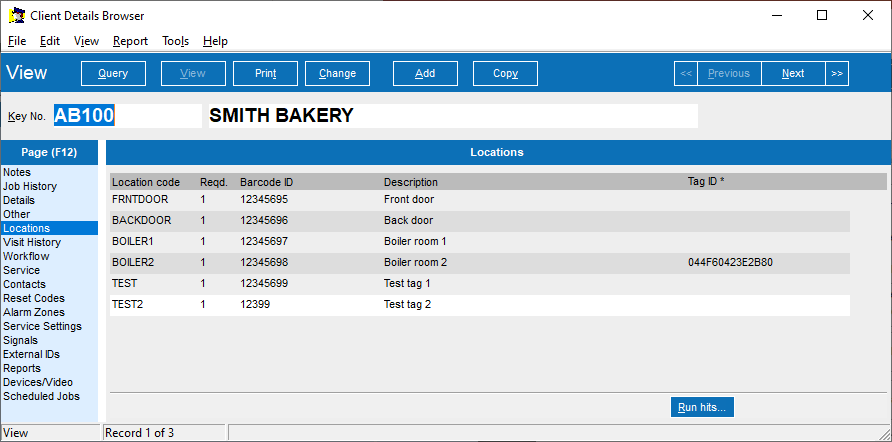
Make sure the client is in Change mode and you'll see a blank line appear. Fill in a location code - a one word short code for the location that will show in certain summaries. Leave the Required count at 1, as this is best handled in Run Maintenance. Fill in the barcode ID in Barcode ID, and a full human-readable description in the description column. This will appear in reports where this location is shown.
The Tag ID field is special. This is the built-in hardware ID that is present in all NFC tags. Theoretically it's unique - no two NFC tags in the world should have the same ID. But there have been reports of duplicates with tags from different manufacturers, so therefore we don't use it as the sole identifier for GDS. But we do use it to check that a tag hasn't been swapped out. Since users can't change the hardware ID then it's nearly impossible for someone replace the tag or create a duplicate without us detecting it.
When adding a new tag you can leave the Tag ID field blank, and GDS will fill it in automatically the first time it is scanned. If you are transitioning from another NFC-based system that does use the tag ID, you can fill it in and GDS will use it to match your old tags that are already in the field. The PDAs can also be set to automatically re-write these old tags to the correct GDS format as they are scanned.
Once you've filled in all the required fields, press the down arrow on the keyboard to move to the next line. GDS will auto-fill the next barcode ID in the sequence for you, though you can overtype this if necessary. Once you've added all of the tags or barcodes for the site, click the View button at the top to store all of the changes.
Trying it out
Once you've added the locations, you can now scan them using the PDA app. Either print out some barcodes using the report (Reports->Make Barcodes), or if you have NFC tags, program them with the correct barcode IDs by logging into the PDA app on your phone and using the More... -> Write NFC tag option. If writing NFC tags, tap Change on the screen to set the barcode ID to match the barcode ID listed against the client. Ensure the Tag type is Location, and leave the Lock tag box unchecked for now. Later on, you can turn the Lock tag option on if you wish, which will lock the tags so that they can no longer be changed.
Once you have a barcode or an NFC tag programmed correctly, scan it with the PDA app. To scan a barcode, tap the 'Scan' button in the app and position the barcode in the viewfinder until it registers.
To scan an NFC tag, it's not necessary to even be in the app at all, as long as you're logged in and the phone is unlocked. Just tap the back of the phone to the NFC tag and it should activate.
Either way, you'll be presented with a set of options. Tap A-OK to confirm that all is OK and the scan will be stored. You can add additional barcode statuses in Maintenance->Attending->Location Status.
Once you've scanned a tag, you can see the scan in Callsign Maintenance. Find the callsign you're looking for then click on the 'Visit History' tab to see your scans.
You can produce reports on your scan history using The Customer Activity or the Barcode History report. These can also be scheduled so that your customers get regular updates on the work you are doing for them. For more information on this, see the Reporting chapter.