Getting Started
Welcome to GDS! There's quite a lot to see and do here, but we'll start by taking you on a little tour of some of the most important parts. If you can, sit yourself in front of a copy of GDS, and if you're using the dispatch system, have an Android phone handy so that you can try that part out too.
The traffic screen
When you first sign into GDS, you are presented with the traffic screen, which looks a little bit like this:

The traffic screen is the central hub of GDS. The main part of it shows the currently outstanding activity, the 'job list'. Most activity is recorded in GDS in 'jobs', and each active job will remain on this traffic screen until it is completed.
Your copy of GDS remains running as long as the traffic screen is open. You can log out by closing the traffic screen. But don't do this yet, there's still plenty to see!
Across the top is the main menu. From here you can access most parts of GDS. For a start, click on the 'Maintenance' menu. You'll see something like this:
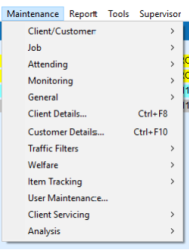
This is where you'll perform most of the data maintenance within GDS. Today we're interested in the 'Client Details' option. Note the 'Ctrl+F8' notation to the right. This is a hint that there's a keyboard shortcut for this option. This tells you that rather than clicking on the menu and choosing the 'Client Details' option, you can press the shortcut keys (hold down CTRL and press F8).
Choose the Client Details option now. You'll be taken to the Client Details Browser.
Searching for and updating client details
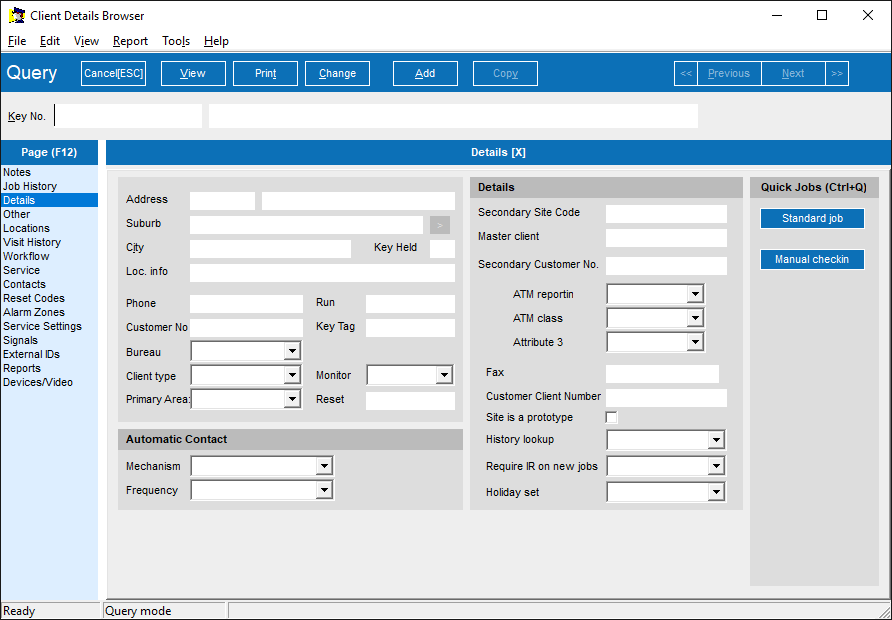
This is where we tell GDS about the clients and sites that we'll be tracking and dispatching to. You'll see many of the usual details we need to know about – in particular the there's a space for the name and address and basic contact details, along with other fields that we'll find out more about soon.
For the moment though, let's focus on that line up near the top, the search bar:

There are 6 main buttons on the left side of the search bar. They are:
- Query: puts the screen into Query or search mode. In the picture above it shows as a Cancel button as we're already in query mode. Normal keyboard shortcut is ALT+Q.
- View: returns the screen to View mode. Shortcut is ALT+V
- Print: prints the current record. Shortcut is ALT+T.
- Change: starts changing the current record. Shortcut is ALT+C.
- Add: starts adding a new record. Shortcut is ALT+A.
- Copy: allows you to copy the current record to make a new client. Shortcut is ALT+Y.
- GDS contact: blue/green if we've had recent contact with the GDS server. If it's orange then it's likely that we're out of coverage;
- Button status: present only if you have a bluetooth button configured. Blue/green if the button is linked properly, and orange if it's not;
- Data pending: means that your phone has data that GDS hasn't received yet. If coverage is poor or there are problems then it'll stay on until the data has gotten through; and
- Photo pending: your phone has a photo that still needs to be uploaded to GDS. It'll work on it in the background.
- >06:00
- 06:00%08:00
- 01/11/2017%01/12/2017
- 02/12/2017 08:00%02/12/2017 09:00
- 02/12/17 is the same as 02/12/2017
- 031217 is the same as 03/12/2017
- 0312170800 is the same as 03/12/2017 08:00
- 0312 is 3rd of December, in the current year
The search bar appears on most major maintenance screens throughout GDS. Once you've learnt how it works here you'll know how it works everywhere.
As you can see, we're currently in Query mode. GDS thinks we are trying to search for a record. Query mode uses 'Query By Example'. In other words, you fill out the parts of the record you know and GDS will find all sites that match the parts you've filled in.
Let's give it a go. The field to the right of the key number field is name field. Let's put a name in it, like this:
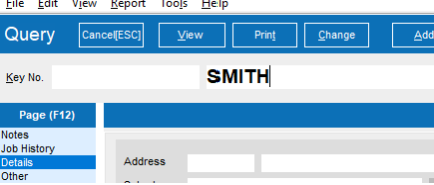
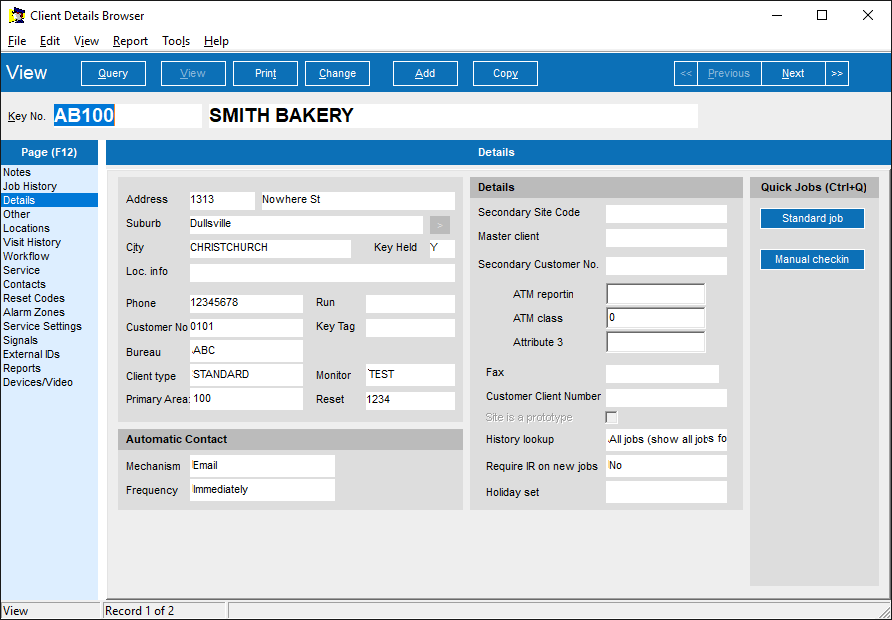
... then click the View button (or press ALT+V, the same thing). This tells GDS that we wish to leave Query mode and View the results. You'll see the results of our search, all clients with 'SMITH' in their name:
You can do combination searches too. For example, to see all SMITHs in CHRISTCHURCH, go back into Query mode by clicking Query, then type SMITH in the name field and CHRISTCHURCH in the city field. A suprisingly good search is actually name and street number – that way if someone has mis-typed the street name you'll still generally find what you're looking for quickly.
Here's another search to try: click Query (or press ALT+Q), then click View (ALT+V) right away, without typing anything to search for. Because you've not specified anything to restrict the search, then all records in the database match, so GDS will show you everything!
Here you'll see the navigation part of the search bar lights up:
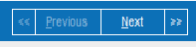
Clicking Next (Alt+N) shows you the next record, Previous (ALT+P) shows you the previous one. The arrows at the sides take you to the first and last records respectively.
Down at the bottom of the window, GDS shows you how many records it found:

… in the demo system this screenshot came from, there are only two clients loaded. In a live system you'll likely see the maximum of 200. By default, GDS will only show 200 records at a time here, to stop you accidentally forcing it to pull back the entire database. In some parts of GDS there are millions of records: we don't want to retrieve them all as it slows the system down, and you don't really have time to look at all of them anyway!
If for some reason you do need to see more than 200, you can use the View->Limit View option to turn it off (click View up the top, then Limit View). While ticked, view limiting is on, otherwise it's unrestricted. Be careful what searches you do when it's off!
Using the search bar, you can do some useful quick counting queries. For example, how many clients do we have in CHRISTCHURCH? Click Query, type CHRISTCHURCH in the city field and click View. You'll see the record count at the bottom. How many clients are in bureau ABC? How many SMITHS are in CHRISTCHURCH? All of these questions can be answered with quick searches.
Let's try a slightly different search. Go into query mode if you're not there already (ALT+Q). Then, in the 'key no.' field, type AB100:
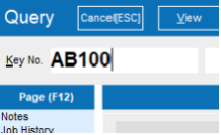
... and click View (ALT+V). This finds the client by key number, also often referred to as site code. Every single client in the entire system is assigned a site code, and it's the preferred way of identifying them. You'll come to learn the sites codes of the clients you work with most often.
Every now and then we'll need to change the details of a client. You can do this by putting it into Change mode (click Change, or press ALT+C). Have a go – click Change (ALT+C), then click in the address number field and change the number to something else. When you're done, click View (ALT+V) to store your changes and move back into View mode.
One last trick: try going into Change mode again (ALT+C). Let's say you've gone into change mode by accident and want to cancel your changes. If you look closely at the Change button, you'll see it has changed, and now it looks like this:

... clicking it, or pressing the ESC key on the keyboard, will cancel your changes.
You can add a new client by clicking Add or Copy above. If you click Add, you'll start with a blank record – you'll need to enter all the details yourself. If you commonly enter certain types of clients you can set up client templates (Quick Sites) to make this faster.
If you click Copy, the details for the client you're currently looking at will be copied into the new record. Have a go now: find Smith Bakery (key no. AB100), then Copy it (ALT+Y). Type AB110 into the key no. field and type in a new address. Then click View (ALT+V) to store it. Note that if somebody else has completed this tutorial before you then AB110 might be in use! GDS will tell you and refuse to save the record. If that happens, try AB111 or AB112. Otherwise, just like when changing a record, you can cancel an Add or Copy by clicking the Cancel button (ESC).
What we're looking at here is only part of the client record. If you look over on the left of the window, you'll see the page selection panel.
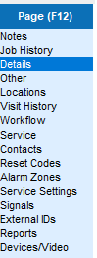
To see the other 'pages' of the client record, click on the page name in the selection box. Or you can press F12 and shortcuts will appear, so pressing F12, then O will take you to the 'Other' page, where the other primary details for the client are stored.
Check out each of the pages to see what they look like. We'll go over some of them in more detail later, but for now let's look at the Notes page (F12, N).
The Notes page is split in half. On the left are permanent notes, notes that will always be attached to this client. They'll show whenever we process jobs or perform tasks for this client. On the right are temporary notes, which are notes that only apply for a certain period of time (for example, if a customer wants us to take a special action, just for the coming week).
Have a go at putting some notes in. Click Change (ALT+C), type your notes into the left panel, then click View (ALT+V) to store them.
That's enough for Client Maintenance for now. If you have an Android phone handy, let's get it set up
Setting up your first PDA phone
The first thing we need to do is get the GDS CATS app on your phone. If your phone already has the GDS CATS app on it then you can skip this step. If you're looking for it, the GDS CATS icon looks like this:

If it's not present or you're not sure, we can proceed and install it anyway.
You can install the GDS app from the Google Play Store. If you install it this way, you'll generally get a slightly older version of the app. For most users, this is fine.
If you want the very latest version, or if you want full control over which version of the app you're running, you can download it directly.
To begin, tap on the Chrome icon on your phone:

Then tap in the address bar at the top, and type the following:
gds.caverock.com/cats
... note that the '/' can be tricky to type. You'll often find it in small type above one of the letters of your on-screen keyboard - if you do, long-press that key to get the '/'. Once you've typed it all, tap the Go button on your keyboard. This will take you to the CATS download page.

Note that the CATS app changes regularly, and each version of it is numbered. You will see a higher version than that shown here.
There are two downloads available here. For the moment, we're only concerned about the top one, CATS...apk. Tap on that and the download will begin.
Once the download has finished, you may see an alert appear at the bottom of the screen, with an OPEN button on it. If you're quick enough, tap on that. Otherwise slide your finger down from the very top of the screen to reveal the status panels:
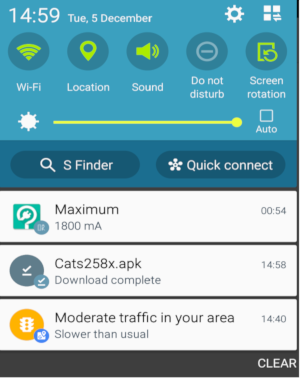
... and tap on the download here instead.
Either way, you may be presented with a screen much like this one:
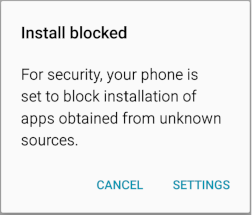
Tap SETTINGS, and you'll be taken to the security screen. Tap on 'Unknown Sources' and you'll get a warning screen. Tap the tick box like this:
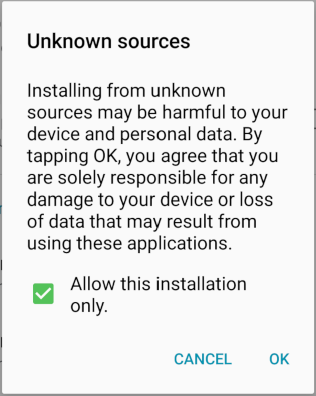
... then tap OK. By doing this we're just allowing this particular app to install. Your phone remains locked and secure against any other app that might try to invade.
Finally, you get the main install screen, which lists the things GDS CATS needs:
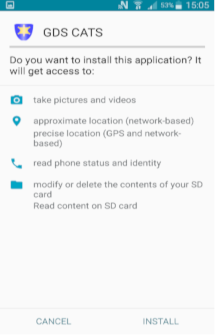
... tap INSTALL and the installation will finish. Tap Done, and this step is complete.
Running the GDS CATS app
To begin, locate and tap on the GDS CATS icon:
If this is the very first time the app has been run on this phone, you'll need to link it to your GDS. You'll be reminded of this if you attempt to log in.
To link the app, tap 'Configure' at the bottom right, then 'Configure this device'. You'll be presented with a configuration screen like this one:

The app needs some information to link to your copy of GDS. For the Phone ID, fill in a short name or number that describes the phone you're using. Whenever someone logs into GDS from this phone, their login will be tagged with this ID so we know which phone they were using. If the phone is always used for a particular run then you might fill in the run or callsign number here. Otherwise a good choice is the cellphone's phone number.
The 'secret' is a value we use to stop guards in the field from messing with the settings and breaking things. You'll need a calculator for this bit. Find the app's version number – it's shown on screen here. In this example, we're running version 258. Type the version number x 4567 into your calculator. The last 4 digits of the result are your secret. For our example, where the version is 258, we get:
258 x 4567 = 1178286
… so the secret is 8286.
Finally, enter the Install code, as supplied to you by Cave Rock, and tap Store Settings. You'll be taken back to the login screen. If you ever need to redo this configuration tap the 'Configure' button at the bottom right of the login screen to get back to the configuration screen.
Logging into the PDA
Once you've configured the PDA, and whenever you start the app in future, you'll be taken to the main login screen:

If you've been assigned a PDA user ID and password by someone else in your organisation, enter those here. In a fresh install of GDS there are a couple of demo callsigns loaded. To log onto one of them, fill in user ID 100, with password 1234, then tap 'Login'.
You may see the area selection screen:
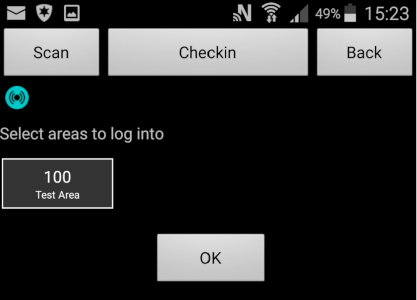
... if you do, tap OK at the bottom without choosing anything. We'll cover this later. Ultimately you'll wind up on the main PDA traffic screen:
From the top, we have some buttons:

Scan is for scanning barcodes. You can place barcodes or electronic NFC tags at locations where you patrol or visit. GDS will track when you scan these in real time and can report on when they were scanned and which ones, if any, were missed. For more information check out the Barcodes and Run Management chapter.
Checkin is a button that issues a 'checkin request' to GDS. By default, at all times when a user is signed into GDS, GDS will GPS track them, and it will also expect to hear from them from time to time. If a guard is running GDS and performing jobs then GDS will generally see the activity and know they're OK. But if they're idle or using the app for welfare only, the user can tap this Checkin button so that GDS knows that all is well. You can also use a bluetooth button to do the same thing without pulling out your phone.
For more information check out the Welfare chapter, but in the meantime tap the Checkin button if your phone makes a noise and you don't know why. It probably wants you to check in!
Logoff ends the PDA session and logs the user off.
Below this are the status indicators:

Often only one is visible. They are:
After that is the main traffic area – this is where the jobs will appear.
Leave the phone where it is for the moment, and return to GDS.
Adding your first job
Almost everything we do in GDS is tracked with 'jobs'. A job records what happened and what steps we took to resolve it. Let's add a job now.
In GDS make sure you're back at the traffic screen. If you still have Client Maintenance up it may be best to close it by clicking the X at the top right of the window (or pressing ALT+F4 when it's active).
On the traffic screen, click the Add Job button at the bottom right. Note that the 'A' is underlined – a hint that you can press ALT+A on the keyboard as a shortcut instead of clicking the button. Throughout GDS you'll see underlined letters on buttons and labels. In each case you can press ALT and that letter to skip to that button or field: a keyboard shortcut.
Don't be too worried about these shortcuts initially, feel free to use the mouse as you learn. But keep an eye out for them and as you become familiar with the system try out the shortcuts for things you do often – they're a lot faster!
Once you've clicked the Add Job button, you'll be presented with an empty job screen:
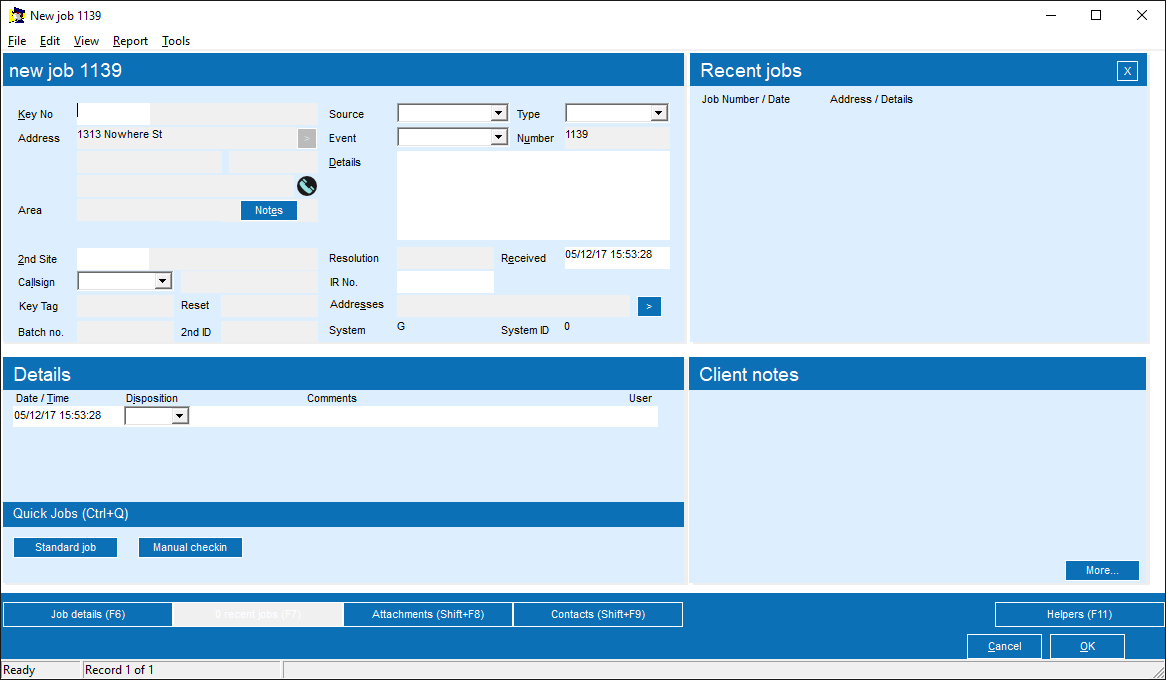
The very first thing that happens, even before the job details are entered, is that GDS assigns a job number to the job. Job numbers are guaranteed unique with GDS: given a job number, you can find any job within the system. If you're talking to other people about a job, always identify it by job number. Give the job number to your customers, staff, and any other organisations that you deal with. Given a job number you can find any job right away. There's even a quick search box on the traffic screen.
While you're here, grab a bit of paper and write that job number down. It'll be handy later.
Now on with the job. Initially the cursor starts in the 'Key No.' field. The first thing GDS wants is a key number or site code. Enter AB100, the site code we were using before. Press TAB on the keyboard to move to the next field.
As soon as you fill in the site code, you'll see the panels on the right change. 'Recent Jobs' updates to show a summary of recent activity at this client. 'Client notes' changes to show any notes you entered against this client in Client Maintenance.
For the callsign, type in your PDA login (100 in our example above), and press TAB again.
For source, type in ALARM1, for type put in ALARM, and for event put in ALARM also. These are values that classify the job to GDS, telling it more about what this job is about. You'll modify these later to values that reflect your business needs. Note that in each you can click the down arrow (or press F4) to see the list of available options. Press TAB after each to move to the next field.
Now you'll be in the details field. This is where we put something for humans to read, telling them what the job is about. Enter something appropriate like 'Activation in zone 2, kitchen'. After this, press ALT+I, or click in the Disposition box in the Details section of the job.
This part of the job contains the 'transcript' or history of the job, telling us what happened throughout the job's lifetime. It's made up of a set of lines: each time we have an update we add a line saying what happened. We're going to add our first line now.
If you click the arrow at the end of the Disposition box you'll see a list of the options available. Each of them has a status code – this is what we type. We use status codes as it's fast, and we'll be doing this a lot. GDS comes with a set of status codes built-in, and you can also add your own.
The code we're interested in today is 'UN TP', which means 'Unconfirmed Dispatch'. Type it or select it now, then press the down arrow or the ENTER key on the keyboard.
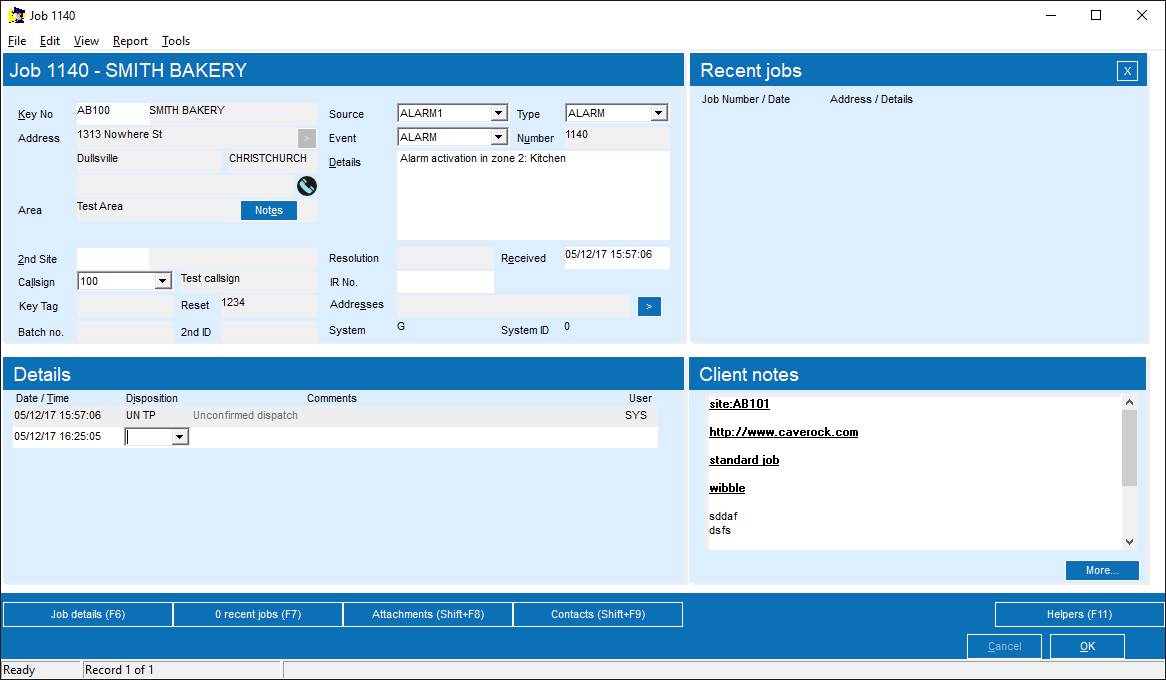
Our job is now ready to go. Click the OK button at the bottom right (or even better, press ALT+O), and the job will be submitted.
Shortly after that your phone should make a noise – the job has arrived!
Before picking up your phone, let's look at GDS one more time. The traffic screen has now changed, and shows a line representing your new job. Double-click on this line (or click in it and press F4), and you'll be returned to the job screen we were just in. We're not going to take any action here – we're just going to watch.
Now, pick up your phone and you'll see the screen looks something like this:
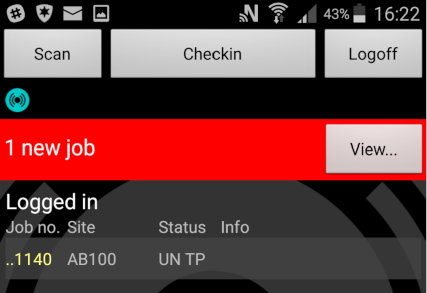
Tap the View button on the phone and you'll be taken into the job. It'll show you the job and site details.
Tap Confirm and you'll be asked for an ETA – estimated time of arrival. Tap something appropriate (eg ETA 5), then tap OK. You'll be back at the job screen on the phone, though the button at the bottom will now have changed to read 'On site'. We'll tap that when we get to the site to do the job.
Now, check the GDS job screen that we brought up earlier. Job updates arrive in real-time, and you should fairly quickly see the update arrive from the PDA. The job is now confirmed – the guard has seen it and has confirmed that they'll act on it.
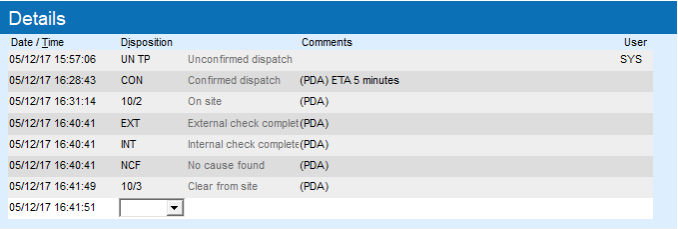
Back on the phone, tap the On site button – we've arrived on site and are ready to complete the job. At this point the guard will normally check the site and perform any tasks necessary. When they're ready to report progress or an outcome, the guard taps the 'Update' button. Try this now.
The base install of GDS contains only a few defined update values. You'll add more to describe your usage scenarios. These update values are divided into two types: 'non-final' and 'final' updates.
Non-final updates describe things that the guard did and found while performing the task – you can choose more than one of these. Tap on EXT and INT – external and internal check completed.
Final updates describe the overall result of the job. You can only select one. Tap NCF (No Cause Found).
Now tap the OK button at the bottom. You'll see a summary of your selections. For each of these, you can tap on the line to add a comment or a photo. Or you can leave them as-is. Where possible we try to set things up so that the guard can tell the entire story of the job just by choosing status updates. We want them typing as little as possible because it's slow and inaccurate. The most common thing they'll type is a person's name when they find staff on site.
Once you're done here, tap the OK button at the bottom of the summary. The updates will be sent through to GDS, and the PDA will be returned to the job screen with the button at the bottom reading 'Offsite'. Tap this to indicate that you've left the job site, then tap OK to return to the PDA traffic screen.
Back in GDS, you'll see that the job has updated to reflect the guard's actions:
While the system has entered this information, the operators can do so too if they wish. They might do this if the PDA/phone is offline or faulty, or if they're dispatching a guard who isn't logged into the system.
At this point, the operator will check the job over to make sure they're satisfied with the work done, and possibly call contacts involved to fill them in on the outcome.
Once the operator is finished, they'll choose NFA (No Further Action), and press the down arrow or Return to finish the job. Do this and then click OK (ALT+O) and the job is complete. You'll be returned to the traffic screen, and our job will have disappeared because it is now complete.
Viewing the PDA statuses
While we’re still working with the PDA, let’s bring up GDS’s view of the PDA network. From the traffic screen, click View->Login (Ctrl+F6) and you’ll see the Welfare Status window:
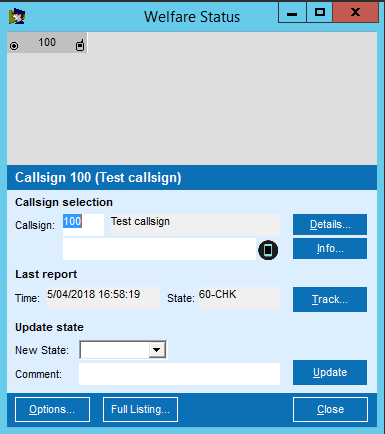
For each PDA/phone that is signed in there’s a box:

... inside is the callsign and two little icons. The icon on the right means that we have recent contact with the PDA, while the icon on the left indicates that we have a recent GPS fix.
If the phone goes out of coverage or loses its network connection, the contact icon will grow a little red strike-out line; if the outage persists, a second strike-out will appear, forming a cross. The GPS fix icon works in a similar fashion, and may change if the officer goes into built-up areas or buildings where getting a position fix is difficult.
Once you have a GPS fix on an officer, you can show their current location and trace on a map by clicking the ‘Track’ button.
This window also controls the welfare status of the active officers. In the image above callsign 100 is in state ‘60-CHK’: 60 minute checkin. That means we expect to hear from this officer at least once per hour. Tap the ‘Checkin’ button on the PDA app and you’ll see the time changes – we’ve just extended the time allowance by another hour.
GDS operators can achieve the same thing by choosing ‘PREV’ from the ‘New State’ dropdown and clicking Update (ALT+U).
When you click the dropdown you can see a number of other options too. Try the ‘OVERDUE’ one and watch what happens. The callsign icon turns white, and the app on the phone shows a ‘Checkin Required’ request. Leave it for long enough and it’ll start making annoying noises too. Check in again and everything will return to normal.
When checking in using GDS itself, we always use PREV. While you can reset the checkin timer by using one of the other statuses (eg 60-CHK), it’s not recommended. PREV always returns the checkin duration to its prior value, so an officer on 60-minute checkin will keep the 60 minute timer, while someone on 30-minute checkin will remain there.
This is especially important as GDS can automatically alter the checkin duration itself in response to certain events. For example, you can configure it so that when an officer arrives on-site at an attendance GDS automatically puts them into 15-minute welfare, then returns them to 60-minute welfare when they go offsite again. Only use the other options when you want to manually force the callsign into a different welfare frequency.
On the PDA phone, try issuing a PANIC alert. To do this, put your finger on the Checkin button, then slide your finger down the screen until the app reports that a panic event has been sent.
Any running copies of GDS will respond quickly: the welfare status alert window will appear in the top corner of all active screens, and an alert sound will play (this may be a default beep, but it can be customised to anything that suits).
You can clear the panic condition by choosing PREV as before. GDS will insist that a comment is also entered in the box below. Note that the officer cannot clear the panic condition from the PDA, it can only be done from within GDS itself. Usually the operators will contact the officer to ensure they’re OK before clearing the panic condition.
Job history and advanced searching
Let's go into the job history screen. To get there, click View→Job Details from the traffic screen (Ctrl+F7). It'll be familiar, and likely will even show the job we've been working with previously.
It has the standard search bar across the top. This search bar allows you to search the jobs in the system and update them. Start by using Query mode to find all jobs for AB100: Click Query (ALT+Q), type AB100 in the key number field and click View (ALT+V).
This will show all jobs in the system for our client. Just as with the client maintenance screen, there's a view limiter active: at most it'll retrieve 200 jobs at a time. This is particularly important as there can be millions of jobs. But if necessary you can turn it off in the same way – click View->Limit View and turn the tick off. Leave it on for now.
A more normal search for a client would be to see their recent jobs. You can do this: Click Query (ALT+Q), click in the Key no. field (ALT+K) and type AB100, then click in the Received field (ALT+E) and type the following (though type today's date instead):
>01/12/2017
… then click View (ALT+V). The '>' sign means 'greater than', so GDS will pull out any jobs since midnight on the morning of the date given.
Other searches you can do with dates:
Everything since 6am this morning
Everything between 6am and 8am this morning ('%' is the between operator)
Everything in the month of November 2017.
Everything between 8 and 9am on the 2nd December 2017
There are some date shortcuts available:
... and a special one: . (fullstop) is shorthand for 'right now'. Not so useful when searching, but handy for some report criteria.
When specifying a date with no time in a search field, GDS will generally assume a time of midnight on the morning of that date. So if you want to see all jobs on a particular date, use something like:
021217%031217
… this translates to 12am on 2nd December to 12am on 3rd of December. It'll extract all jobs that started on the 2nd of December.
You can combine date searches with other criteria too. In particular you can search text fields for information. In the job, a good candidate is the general Details field (ALT+D).
If in the details field you search for: Kitchen then GDS will return all jobs with the word 'Kitchen' in them. You can also use so-called wildcard searches. The \* character is a place holder. Search for activation\* and you'll get everything starting with Activation.
Search for \*activation\*kitchen\* and you'll get all jobs where the description has the word activation followed by the word kitchen. Note the \*s at the beginning and end – they tell GDS that we're allowed to have other text at the start and end of the details field. Without them, GDS would expect the entire description to start with the word 'activation' and end with the word 'kitchen', likely not what you want!
Text wildcard searching also works well in Client Details. Use it to search the client's name, or the site code/key number.
Note that there are some places wildcard searching doesn't work where you might expect it to. In particular you can't wildcard search in the site code/key number in the job itself. You need to use the wildcard search in the client screen first, to find the exact client you're looking for, then come back here to search for the jobs involving that client.
One final tip: when you're looking for a client in a job, either because you're adding a new job, or because you're searching for an existing job, you can enter the client search screen by pressing F4 while you're in the key no. field.
Let's try it now: while you're in the Job Details screen, make sure you're in Query mode (ALT+Q), then click in the key no. field (ALT+K), then press F4 to search. The Client Details Browser pops up. Click in the name field (to the right of the Key No. field), and type SMITH BAKERY. Then click View (ALT+V) to find the client. Once you've found the client, close the Client Details Browser (or press ALT+F4), and GDS will bring the site code for the site you found back into the job screen. Once you're back here, type kitchen into the Details box and click View (ALT+V) to find the jobs.
The Quick Search window
One final point of call is the Quick Search window. As usual, it's hinted at from the traffic screen (it's there under the View menu). But most of the time you'll get there by using its shortcut key – F8. This works from most places in the system. When you press it, you get this:
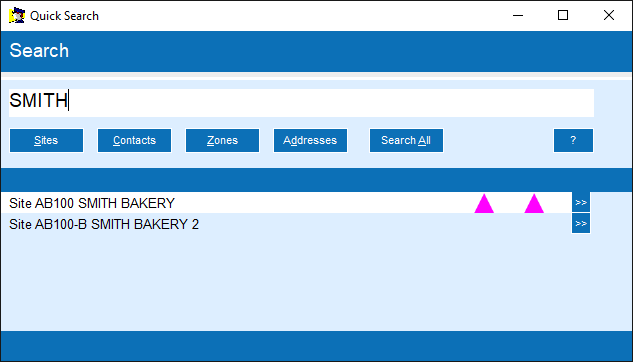
The Quick Search screen can search by client name, code, address and a number of other criteria. Type what you're looking for and press ENTER, and the system will perform a site search. Otherwise you can search for other things by clicking the buttons above or using the shortcut keys they are labeled with.
If you have monitoring or the service task system active, then GDS will show icons beside each site entry, representing the current status of the site: for monitoring, you can tell whether the alarm is set or not, or in activation, right here.
Once you've found the site or entity that you're looking for, you can open it by clicking it. Otherwise pressing F4 will open the currently highlighted line, and the arrow keys can be used to move up and down through the list.